


Waterproofing of roofs, basements, etc. shall be laid under appropriate manufacturer guarantees supplemented
by a contractor workmanship guarantee. Waterproofing to flat roofs shall be laid with a minimum fall to outlets of
1:80 and include all outlets, etc.Waterproof of external basment walls shall take into account the definition of dry and wet sides as per SANS 10021: 2006 6.15.2 and 6.1.5.3 and provide one or two layer membrane systems as
appropriate descriptions of sheets or membrane waterproofing shall be deemed to include all labour costs.

Apply Safeguard SG720″ primer to prepared surfaces, followed by two coats of “Safeguard SG280” waterproofing polyurethane and one coat of SG PU440 with SG PU Fabric on horizontal and vertical joints.
Apply Safeguard SG720″ primer to prepared surfaces, followed by two coats of “Safeguard SG280” waterproofing polyurethane and one coat of SG PU450 with SG PU Fabric on horizontal and vertical joints.
Thoroughly clean and prepare the surface, as per Safeguard Method Statement for Surface Preparation.
Apply one coat of Safeguard solvent-based Bitumen Primer to the surface ensuring full coverage without any “ponding” of primer on the surface.
Allow to dry and heat-fuse one layer of Safeguard Euro Gecko 4mm APP single re-inforced Bitumen Membrane to the primed surface, lapping all side walls and dressing into and around outlets and upstands.
Provide 100mm side laps and 150mm end laps to adjoining rolls of membrane, ensuring that laps are properly “bled”.
Suitable performance-related products are acceptable.
5-7 days after application of the Bitumen Membrane, thoroughly clean the surface of the membrane and apply 2 coats of Safeguard Bitumen Aluminium paint to the membrane using a brush, roller or spray.
Equivalent products are acceptable.
Thoroughly clean and prepare the surface, removing all laitance, dust, dirt, grime and grease.
Apply one coat of solvent-based Bitumen Primer to the surface ensuring full coverage without any “ponding” of primer on the surface.
Allow to dry and heat-fuse one layer of 4mm APP single re-inforced Bitumen Membrane to the primed surface, lapping all side walls and dressing into and around outlets and upstands.
Provide 100mm side laps and 150mm end laps to adjoining rolls of membrane, ensuring that laps are properly “bled”.
5-7 days after application of the Bitumen Membrane, thoroughly clean the surface of the membrane and apply 2 coats of Bitumen Aluminium paint to the membrane using a brush, roller or spray

Thoroughly clean and prepare all external walls from foundation to 2 brick courses above finished ground level as per Safeguard Method Statement for Surface Preparation.
Apply one coat of Safeguard SG 720 Primer to the walls by spray, roller or brush and allow to dry.
Apply two coats of Safeguard SG PU 610 by spray, roller or brush. If applying by spray, dilute with 5% MEK. Allow the first coat to dry overnight. A third coat should be applied where “Wet” sites are encountered as per SANS 10021:2006 6.1.5.3
Protect membrane with soft board or dimpled membrane prior to backfill.
Equivalent performance-related products may be supplied.
Thoroughly clean and prepare all external walls from foundation to 2 brick courses above finished ground level, removing all dirt, dust, grime grease and any unnecessary mortar,
Apply one coat of Polyurethane Primer to the walls and allow to dry.
Apply two coats of Polyurethane waterproofing membrane to a DFT of 1-2mm. The membrane should accommodate temperatures from -30? to +90?C and have a minimum elasticity of 600% with a Shore A hardness of 60 or greater and a Tensile strength of 4N/mm? or greater. Allow the first coat to dry overnight. A third coat should be applied where “Wet” sites are encountered as per SANS 10021:2006 6.1.5.3
Protect membrane with soft board or dimpled membrane prior to backfill.
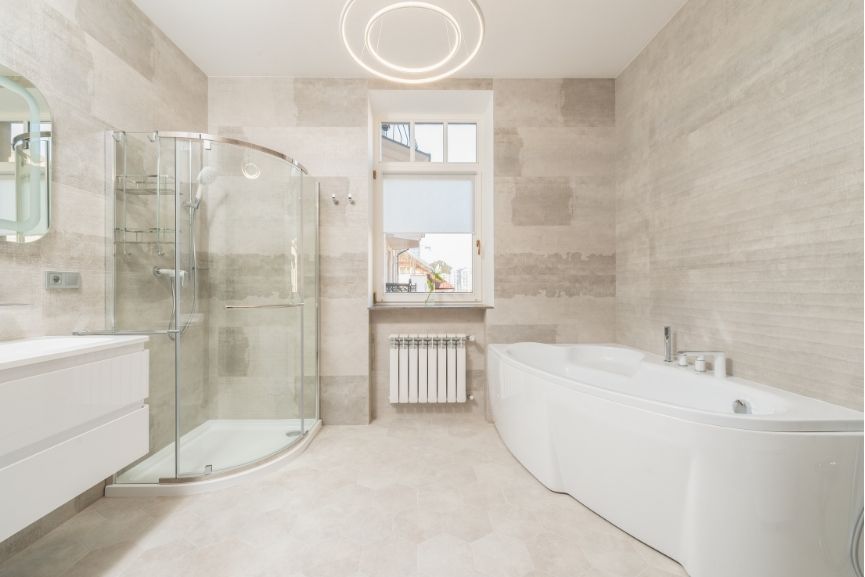
Thoroughly clean shower walls and floor, removing all loose dirt, mortar, grime and grease. Walls should not be plastered.
Apply a coat of Safeguard Latseal Slurry mixed with Bondaid to the walls and floor, embedding a non-woven polypropylene membrane into the slurry at all joints.
Allow to cure overnight and apply a further coat of Safeguard slurry to the entire area.
At the joint with the outlet, an expandable polyurethane sealant should be applied to cover both surfaces. This should be allowed to cure, together with the slurry before application of any tiles/mosaics.
Equivalent products are acceptable.
Thoroughly clean shower walls and floor, removing all loose dirt, mortar, grime and grease. Walls should not be plastered.
Apply a coat of cementitious waterproof slurry mixed with bonding liquid to the walls and floor, embedding a non-woven polypropylene membrane into the slurry at all joints.
Allow to cure overnight and apply a further coat of slurry to the entire area.
At the joint with the outlet, an expandable polyurethane sealant should be applied to cover both surfaces. This should be allowed to cure, together with the slurry before application of any tiles/mosaics.
PRODUCT GUARANTEE

Polyurethane Roofing – SG PU280
Polyurethane Foundation – SG PU610
Joint Sealant – SG Flex20
Bitumen Roofing – 4mm Torch-on membrane
Polyurethane Undertile Showers / Balconies – SG PU610
Cementitious Undertile Showers/Balconies – Latseal Slurry
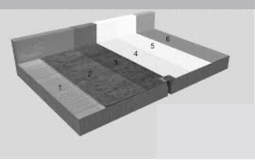
SG PU 280 Flat Roof
SG PU 610 Garden Roof
SG 4mm Bitumen Roof
SG PU 610 Foundation
SG PU 280 Car parking
Waterproofing of roofs, basements, etc. shall be laid under appropriate manufacturer guarantees supplemented
by a contractor workmanship guarantee. Waterproofing to flat roofs shall be laid with a minimum fall to outlets of
1:80 and include all outlets, etc.Waterproof of external basment walls shall take into account the definition of dry and wet sides as per SANS 10021: 2006 6.15.2 and 6.1.5.3 and provide one or two layer membrane systems as
appropriate descriptions of sheets or membrane waterproofing shall be deemed to include all labour costs.
Apply Safeguard SG720″ primer to prepared surfaces, followed by two coats of “Safeguard SG280” waterproofing
polyurethane and one coat of SG PU440 with SG PU Fabric on horizontal and vertical joints.
Apply Safeguard SG720″ primer to prepared surfaces, followed by two coats of “Safeguard SG280” waterproofing
polyurethane and one coat of SG PU450 with SG PU Fabric on horizontal and vertical joints.
Thoroughly clean and prepare all external walls from foundation to 2 brick courses above finished ground level as per Safeguard Method Statement for Surface Preparation.
Apply one coat of Safeguard SG 720 Primer to the walls by spray, roller or brush and allow to dry.
Apply two coats of Safeguard SG PU 610 by spray, roller or brush. If applying by spray, dilute with 5% MEK. Allow the first coat to dry overnight. A third coat should be applied where “Wet” sites are encountered as per SANS 10021:2006 6.1.5.3
Protect membrane with soft board or dimpled membrane prior to backfill.
Equivalent performance-related products may be supplied.
Thoroughly clean and prepare all external walls from foundation to 2 brick courses above finished ground level, removing all dirt, dust, grime grease and any unnecessary mortar,
Apply one coat of Polyurethane Primer to the walls and allow to dry.
Apply two coats of Polyurethane waterproofing membrane to a DFT of 1-2mm. The membrane should accommodate temperatures from -30? to +90?C and have a minimum elasticity of 600% with a Shore A hardness of 60 or greater and a Tensile strength of 4N/mm? or greater. Allow the first coat to dry overnight. A third coat should be applied where “Wet” sites are encountered as per SANS 10021:2006 6.1.5.3
Protect membrane with soft board or dimpled membrane prior to backfill.
Thoroughly clean and prepare the surface, as per Safeguard Method Statement for Surface Preparation.
Apply one coat of Safeguard solvent-based Bitumen Primer to the surface ensuring full coverage without any “ponding” of primer on the surface.
Allow to dry and heat-fuse one layer of Safeguard Euro Gecko 4mm APP single re-inforced Bitumen Membrane to the primed surface, lapping all side walls and dressing into and around outlets and upstands.
Provide 100mm side laps and 150mm end laps to adjoining rolls of membrane, ensuring that laps are properly “bled”.
Suitable performance-related products are acceptable.
5-7 days after application of the Bitumen Membrane, thoroughly clean the surface of the membrane and apply 2 coats of Safeguard Bitumen Aluminium paint to the membrane using a brush, roller or spray.
Equivalent products are acceptable.
Thoroughly clean and prepare the surface, removing all laitance, dust, dirt, grime and grease.
Apply one coat of solvent-based Bitumen Primer to the surface ensuring full coverage without any “ponding” of primer on the surface.
Allow to dry and heat-fuse one layer of 4mm APP single re-inforced Bitumen Membrane to the primed surface, lapping all side walls and dressing into and around outlets and upstands.
Provide 100mm side laps and 150mm end laps to adjoining rolls of membrane, ensuring that laps are properly “bled”.
5-7 days after application of the Bitumen Membrane, thoroughly clean the surface of the membrane and apply 2 coats of Bitumen Aluminium paint to the membrane using a brush, roller or spray.
Thoroughly clean shower walls and floor, removing all loose dirt, mortar, grime and grease. Walls should not be plastered.
Apply a coat of Safeguard Latseal Slurry mixed with Bondaid to the walls and floor, embedding a non-woven polypropylene membrane into the slurry at all joints.
Allow to cure overnight and apply a further coat of Safeguard slurry to the entire area.
At the joint with the outlet, an expandable polyurethane sealant should be applied to cover both surfaces. This should be allowed to cure, together with the slurry before application of any tiles/mosaics.
Equivalent products are acceptable.
Thoroughly clean shower walls and floor, removing all loose dirt, mortar, grime and grease. Walls should not be plastered.
Apply a coat of cementitious waterproof slurry mixed with bonding liquid to the walls and floor, embedding a non-woven polypropylene membrane into the slurry at all joints.
Allow to cure overnight and apply a further coat of slurry to the entire area.
At the joint with the outlet, an expandable polyurethane sealant should be applied to cover both surfaces. This should be allowed to cure, together with the slurry before application of any tiles/mosaics.